Getting started
Details on how to get started with using the Scaut platform:
Getting Started
Learn how to get started with the Scaut platform.
Step 1: Registering for Scaut
Go to app.scaut.com and click Sign up to begin. You will receive a verification email with a code. Use the code to verify your account, then sign in.
Step 2: Set up your preferences
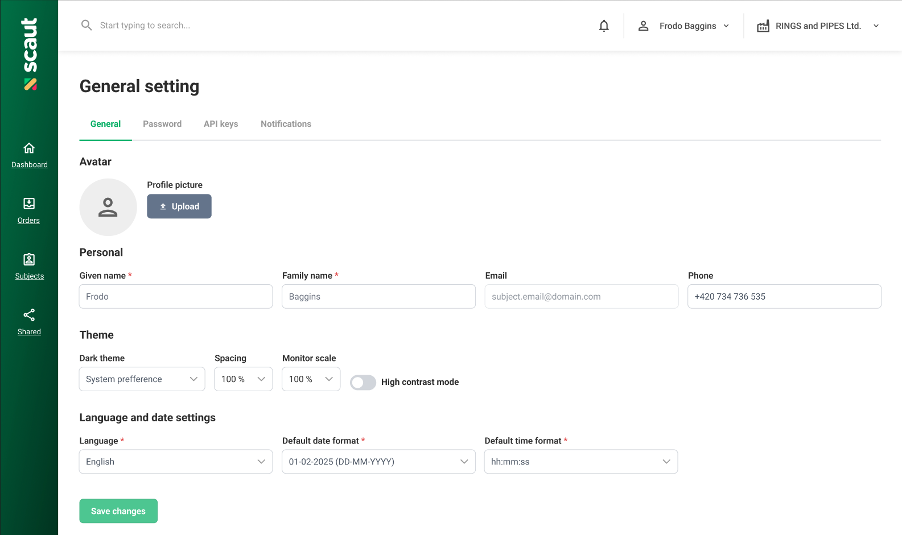
You will now have access to the Scaut platform. Several features, such as ordering and notification preferences, will be unavailable until your organization has been enabled or you have joined an active organization as a user. We recommend setting up your user profile by clicking the Profile menu and selecting Personal settings from the options. Here you can:
- Upload a profile picture (recommend 512x512px)
- Check or change your name or email
- Pick your language, time, and date settings
- Check or change your password
- Manage API keys
- Select notification settings (after your organization is set up)
Step 3: Create your organization (for new organization users)
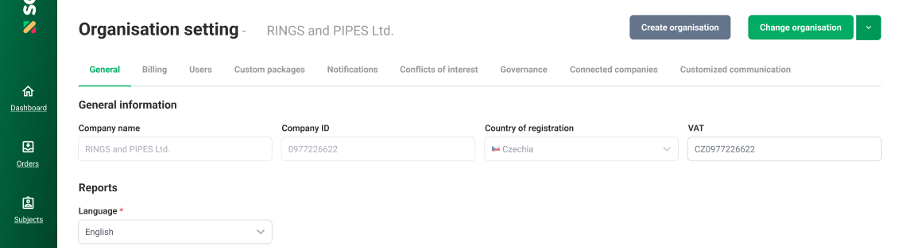
If you are a new subscriber to the Scaut platform, the following steps will help you set up your organization. Click the top-right button (Demo), select Organization settings from the menu, then select the Create organization button:

Create your organization by entering details such as:
- Country
- VAT number
- Name
- Address
You may also choose several organization-specific options, such as:
- Showing prices on the platform for your users
- Showing price in your local currency
- Scaut will then need to activate your organization. This may take some time.
Step 4: Set your organization preferences (for organization owners)
Once your organization is activated, you may adjust your organization preferences from the same organization page. Choose the tab that you want to edit:
- Billing
- Users
- Custom packages
- Notifications
- Governance
- Connected companies
- Customized communication
Step 5: Invite new users
Once you have established your organizational settings, you can now build your Scaut user team by inviting users to the platform.
Important: Before you can invite users to Scaut, they must be registered first. Before inviting additional users, we recommend sending an email to your team to let them know they will soon be invited as users. Ask them to register for the platform at https://app.scaut.com/auth/signup and to let you know once they have registered.
Go to the Users tab in your organization settings, and enter the details required for your new user.

Your user will receive an email inviting them to your organization. The email will instruct them to log in to Scaut, where they can accept the invite on the 'My Organizations' page and join your team. Your new user can then set up their notification settings, place orders, and do anything within the scope of the role you selected for them.
Step 6: Placing an order
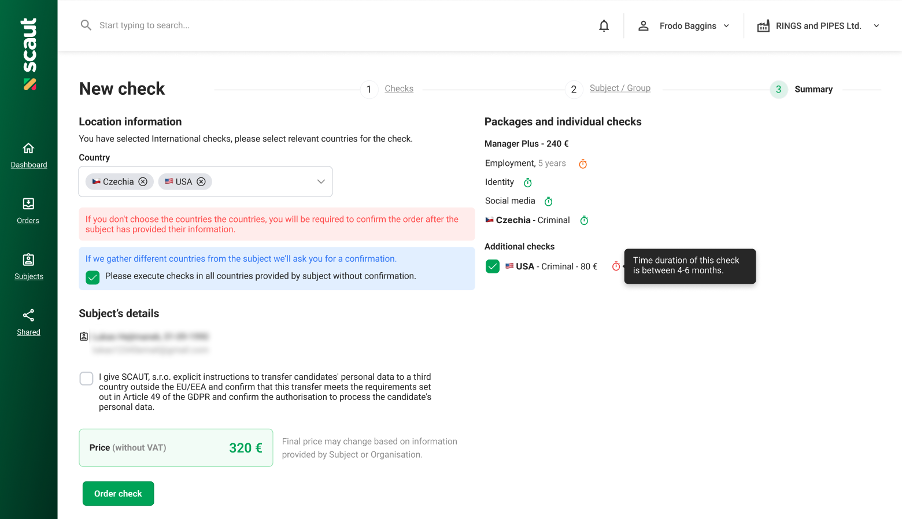
Placing a screening order with Scaut is easy, and this section shows you how. Whether you are ordering individual checks or packages, the solutions to your verification challenges are just a few clicks away. Go to the Orders page (icon in the left-side green bar), and select the green New check button.

- Select your subject type (candidate, employee, or company) – we’ll use candidate for this example.
- Choose the Packages or Individual checks you wish to run on the candidate. You will also choose location and duration here.
- Enter the subject's details (or bulk list). You can also select an existing subject if you’ve run a verification before. New subjects will typically require their name details, contact email (and preferred language), and a phone number if possible.
- View the summary, and if everything is correct, select the Place order button.
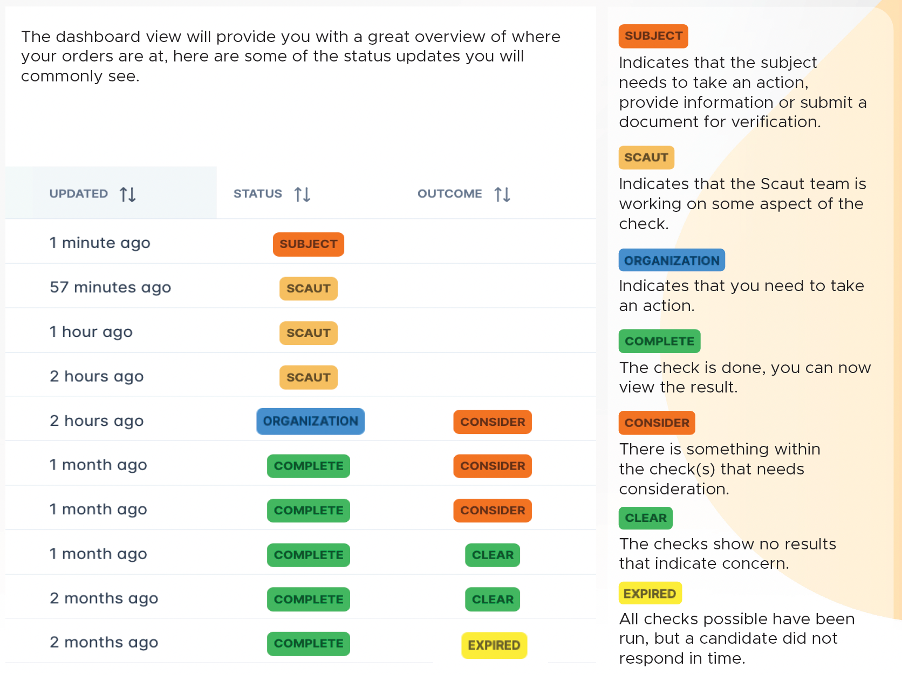
Step 7: Monitoring your order progress
Your order will now appear in the Dashboard and Order screens, and the subject will be displayed in the Subject area. You can now monitor the progress of your order at a glance, or click on the subject bar for more detailed information.
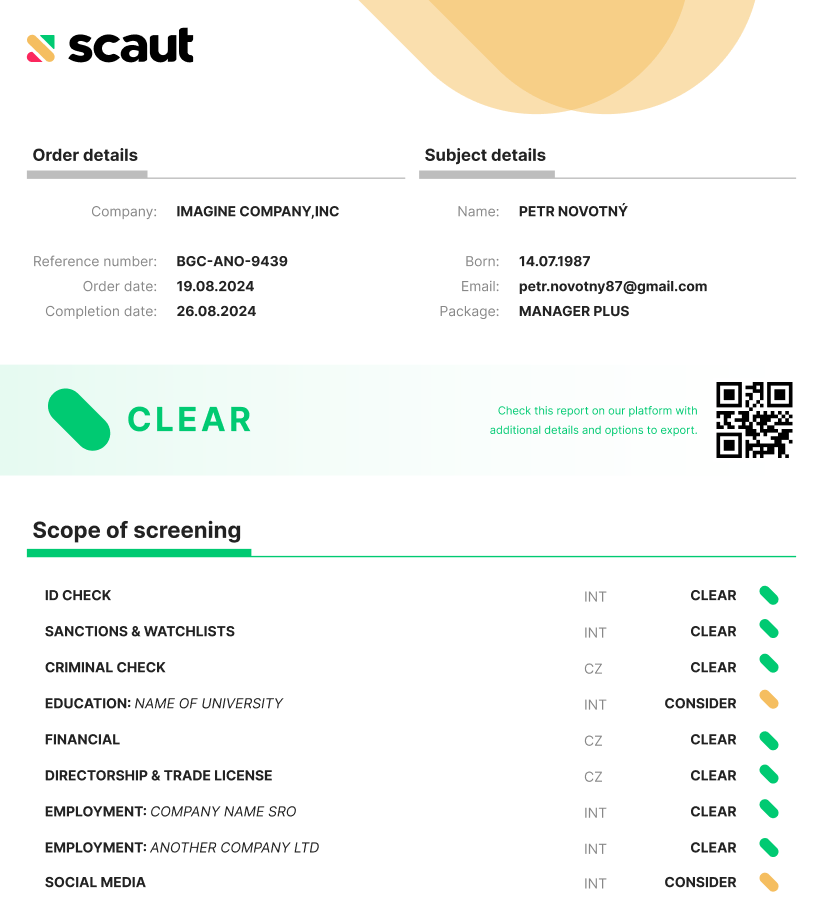
Step 8: Download reports
In some cases, having a report of your check will be useful. Scaut makes that possible by providing both summary and detailed reports that can be accessed and downloaded from the Expanded detail section of any subject in the Dashboard.
Step 9: Explore!
There are too many features to cover in this guide, but we encourage our users to explore! We are here to support you in any way we can. If you have any questions, please visit our help centre or the resource hub on the Scaut website.
Updated 3 months ago